The Ultimate Guide to GitHub CI/CD Pipelines
A GitHub CI/CD pipeline helps your team build, test, and deploy code automatically. Instead of manually running tests before every release or uploading files to a server after each change, you define a repeatable workflow that runs whenever code is pushed or a pull request is opened.
For modern teams, this means fewer release mistakes, faster feedback, and a clearer path from code review to production.
This guide explains how GitHub CI/CD works with GitHub Actions, how to structure a reliable pipeline, and how to deploy safely without exposing secrets.
What Is CI/CD?
CI/CD combines two development practices:
Continuous Integration (CI): Automatically build and test code whenever developers push changes or open pull requests.
Continuous Delivery or Continuous Deployment (CD): Automatically prepare or release approved code to a staging or production environment.
A simple pipeline often follows this sequence:
A developer opens a pull request.
The CI workflow installs dependencies and runs tests.
Code review is completed.
Changes are merged into the main branch.
A deployment workflow sends the approved version to staging or production.
The goal is not to deploy everything automatically on day one. The goal is to make every release predictable, traceable, and safe.
Why Use GitHub Actions for CI/CD?
GitHub Actions is built directly into GitHub. You can define workflows in YAML files inside your repository, usually under:
.github/workflows/A workflow can respond to events such as pushes, pull requests, manual runs, tags, schedules, or reusable workflow calls.
For example:
.github/workflows/ci.ymlGitHub Actions workflows use YAML and are stored in the .github/workflows directory. A workflow contains one or more jobs, and each job contains steps. GitHub workflow syntax documentation
CI/CD Pipeline Architecture
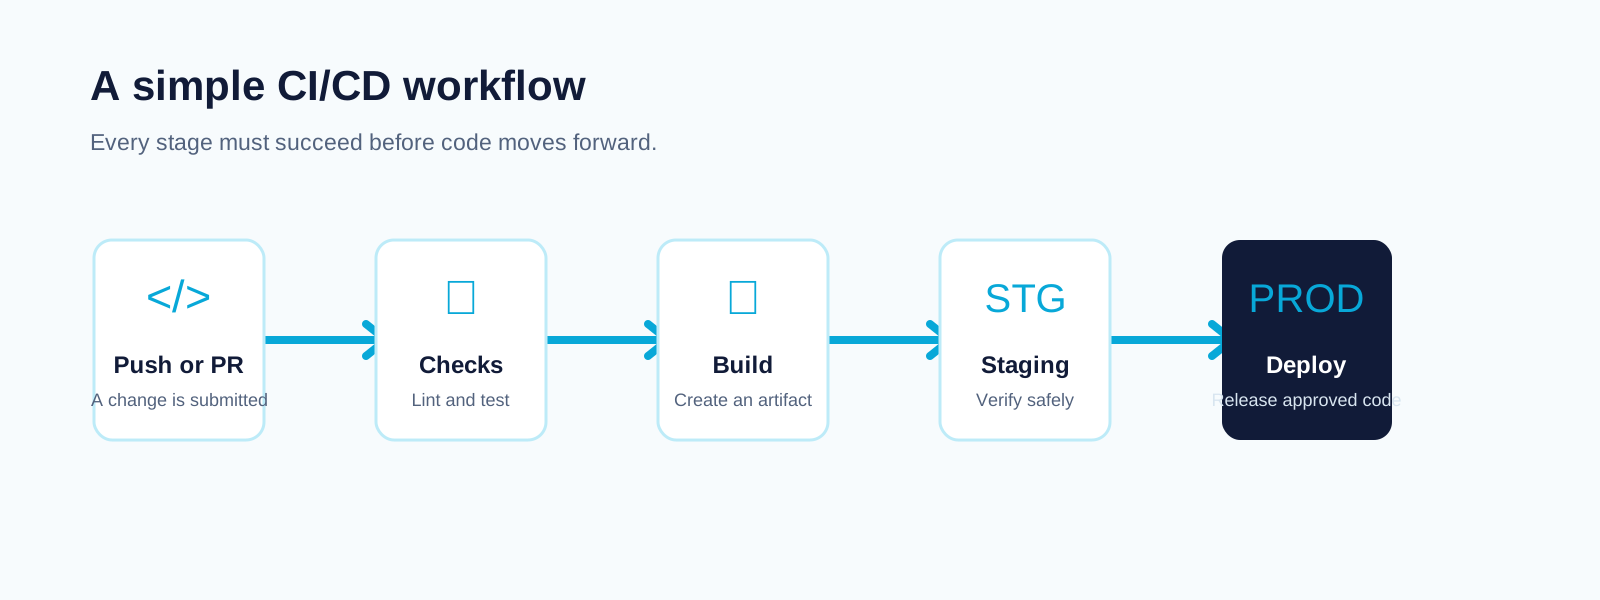
A practical pipeline can be divided into four stages:
Code Push / Pull Request
        ↓
Install Dependencies
        ↓
Lint + Test + Build
        ↓
Deploy to Staging / Production
Not every project needs every step. A small PHP application may run PHPUnit and deploy through SSH. A Node.js application may run linting, unit tests, build assets, then deploy to a cloud platform.
The important part is that deployment should only happen after your quality checks pass.
Step 1: Create a Basic CI Workflow
Create a new file:
.github/workflows/ci.ymlHere is a basic GitHub Actions workflow for a Laravel project:
name: Laravel CI

on:
  pull_request:
    branches: [main]
  push:
    branches: [main]

permissions:
  contents: read

jobs:
  test:
    runs-on: ubuntu-latest

    steps:
      - name: Check out repository
        uses: actions/checkout@v4

      - name: Set up PHP
        uses: shivammathur/setup-php@v2
        with:
          php-version: "8.3"
          extensions: mbstring, pdo_sqlite
          coverage: none

      - name: Install Composer dependencies
        run: composer install --prefer-dist --no-progress --no-interaction

      - name: Prepare Laravel environment
        run: |
          cp .env.example .env
          php artisan key:generate
          touch database/database.sqlite

      - name: Run tests
        run: php artisan test
This workflow runs whenever someone opens or updates a pull request targeting main, and again when code is pushed to main.
The workflow performs these actions:
Downloads your repository.
Configures PHP.
Installs Composer packages.
Creates an application key and test database.
Runs the Laravel test suite.
If the tests fail, the pull request shows a failed check. This makes it much easier to prevent broken code from reaching production.
Step 2: Add Linting and Front-End Builds
Testing is important, but CI should also catch formatting, static-analysis, and build errors.
For a Laravel project using Vite, add Node.js steps:
      - name: Set up Node.js
        uses: actions/setup-node@v4
        with:
          node-version: 20
          cache: npm

      - name: Install front-end dependencies
        run: npm ci

      - name: Build front-end assets
        run: npm run build
Use npm ci in CI instead of npm install when you have a lock file. It installs the exact dependency versions recorded in your project.
You can also add project-specific checks:
      - name: Check code style
        run: ./vendor/bin/pint --test

      - name: Run static analysis
        run: ./vendor/bin/phpstan analyse
Only add checks your team can maintain. A strict pipeline that fails constantly because of ignored warnings will eventually be bypassed.
Step 3: Use Branches Properly
A simple and reliable branch strategy is:
main— production-ready codestaging— optional pre-production testingfeature/*— individual development workhotfix/*— urgent production fixes
Typical workflow:
feature branch → pull request → CI checks → review → main → deploymentConfigure branch protection on main so pull requests cannot be merged until required CI checks pass. This makes your CI pipeline part of the release process instead of an optional report.
Step 4: Deploy Only After Tests Pass
Deployment should be a separate job that depends on the test job.
deploy:
  needs: test
  if: github.ref == 'refs/heads/main' && github.event_name == 'push'
  runs-on: ubuntu-latest

  steps:
    - name: Check out repository
      uses: actions/checkout@v4

    - name: Deploy application
      run: echo "Deploy your application here"
The needs: test condition ensures deployment only starts if the test job succeeds.
For a real application, replace the placeholder with your deployment method. Common options include:
SSH deployment to a VPS
Docker image deployment
GitHub Actions deployment to cloud providers
Laravel Forge, Ploi, Envoyer, or similar services
Platform deployment such as Vercel, Netlify, Render, or AWS
Example: Deploy Laravel Through SSH
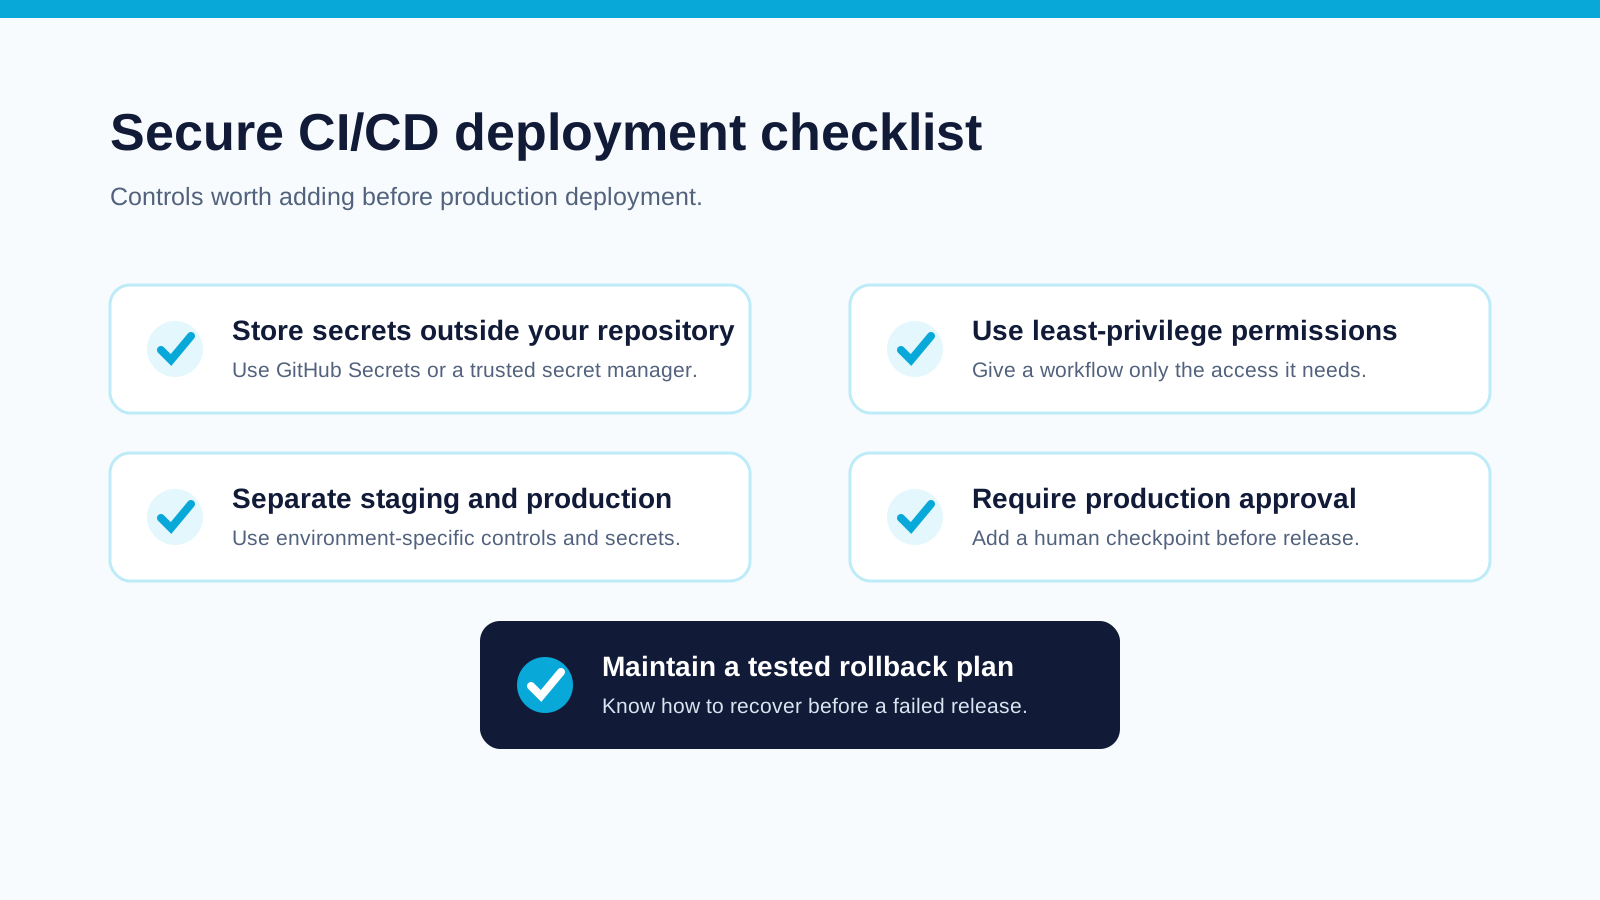
Store your SSH key, host, username, and deployment path as GitHub Actions secrets. Do not place them directly in your workflow file.
Example deployment job:
deploy:
  needs: test
  if: github.ref == 'refs/heads/main' && github.event_name == 'push'
  runs-on: ubuntu-latest
  environment: production

  steps:
    - name: Deploy over SSH
      uses: appleboy/ssh-action@v1.2.2
      with:
        host: ${{ secrets.DEPLOY_HOST }}
        username: ${{ secrets.DEPLOY_USER }}
        key: ${{ secrets.DEPLOY_SSH_KEY }}
        script: |
          cd /var/www/example-app
          git pull origin main
          composer install --no-dev --prefer-dist --optimize-autoloader --no-interaction
          php artisan migrate --force
          php artisan optimize:clear
          php artisan config:cache
          php artisan route:cache
Review every deployment command carefully. A production workflow should not run destructive commands unless you understand the effect and have a rollback plan.
Step 5: Protect Secrets and Credentials
Never commit these items to GitHub:
.env
API keys
database passwords
SSH private keys
cloud access keys
payment provider credentials
Instead, add them under:
Repository → Settings → Secrets and variables → ActionsThen access them in workflows with:
${{ secrets.SECRET_NAME }}Use the smallest possible set of permissions for every workflow. GitHub Actions supports a permissions key at the workflow or job level, so you can avoid granting write access when a job only needs to read repository contents. GitHub permissions reference
For cloud deployments, consider OpenID Connect (OIDC) instead of keeping long-lived cloud credentials in GitHub secrets. OIDC can let a workflow request short-lived cloud tokens for a specific deployment. GitHub OIDC guidance
Step 6: Use GitHub Environments for Staging and Production
GitHub Environments help separate deployment rules and secrets.
You might create:
stagingproduction
Then add this to a job:
environment: productionFor production, configure required reviewers. The workflow pauses until an authorized person approves the deployment. This gives you automation without losing control over production releases.
Use environment-specific secrets when staging and production require different credentials.
Step 7: Prevent Duplicate Deployments
If multiple commits are pushed quickly, you usually do not want several production deployments running at once.
Add concurrency controls:
concurrency:
  group: production-deploy
  cancel-in-progress: false
This makes deployments wait their turn instead of overlapping. For preview environments or non-production builds, you may choose cancel-in-progress: true so only the newest workflow continues.
Step 8: Reuse Common Workflows
As your projects grow, you may repeat the same test and deployment logic across repositories. Reusable workflows help avoid copying large YAML files everywhere.
A reusable workflow uses the workflow_call trigger, then another workflow calls it with uses.
This is useful for shared Laravel testing, Node builds, security checks, or deployment patterns. GitHub reusable workflow documentation
Common GitHub CI/CD Mistakes
Deploying before testing
Always make deployment depend on successful tests. A workflow that deploys every push without checks can make releases faster, but it also makes failures faster.
Giving workflows excessive permissions
Avoid broad write permissions by default. Set only the permissions the workflow needs.
Storing secrets in YAML files
Secrets committed to Git history can be difficult to fully remove. Use GitHub Secrets or a proper secret-management service.
Using pull_request_target without understanding the risk
Be especially careful with workflows triggered by pull requests from forks. Do not run untrusted pull-request code with access to repository secrets.
Skipping rollback planning
A deployment pipeline is not complete if it cannot recover from a failed release. Keep a documented rollback process, database migration strategy, and backup plan.
Treating CI/CD as a one-time setup
Pipelines need maintenance. Update action versions, review failing steps, reduce slow jobs, and improve feedback when developers repeatedly hit the same error.
A Production CI/CD Checklist
Before relying on your GitHub pipeline for production releases, confirm that you have:
Automated tests running on pull requests.
Build checks for front-end assets where applicable.
Branch protection on
main.Separate staging and production environments.
Secrets stored outside source code.
Least-privilege workflow permissions.
Deployment only after successful checks.
A deployment log and failure notifications.
A tested rollback process.
Clear ownership for production approvals.
Final Thoughts
A good GitHub CI/CD pipeline is not the most complex one. It is the one your team trusts.
Start with a small workflow that installs dependencies and runs tests on every pull request. Next, add build checks and a controlled staging deployment. Once that is stable, introduce production approvals, environment protection, reusable workflows, and short-lived cloud credentials.
With each improvement, your releases become less dependent on manual memory and more dependent on a reliable process.